
There are tonnes of articles and blog posts available explaining the benefits of using Docker in software development lifecycle and the ways of doing so. A lot of them also explain how to use Docker in development process. However, the majority of them assume that one has a Docker CE or Docker Desktop running on their local environment.
There are some scenarios when installing Docker Desktop to the one’s environment is either physically impossible or won’t help the cause. For example, if your development environment running non-supported versions of Windows. Or your company uses virtual Windows Desktop running in the cloud or as a WMWare Virtual Machine.
In first case there is an option of using the Docker Toolbox, however the second scenario leaves very little room for workarounds: in my experience running Docker on the virtualised Windows instance is extremely slow. It might work eventually, but the experience is frustrating.
Is there any option available?
Behind the scene on the non Linux environments, Docker uses a Linux VM. So, the natural choice in the scenario described above would be a separate Linux VM where Docker CE runs without any performance degradation.
It could be a on premise VM or cloud based VM or a separate piece of hardware running Linux OS, regardless all you have to do is:
- install Linux OS on the VM or hardware kit
- setup Docker CE on the Linux Instance
- enable remote access to the Docker Daemon running on the Linux Instance (optionally)
Setting Up Docker Instance
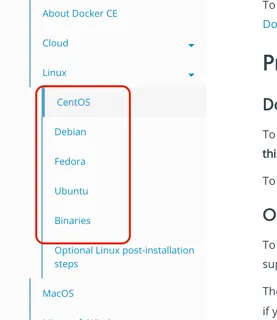
Follow Docker documentation to install Docker CE. The link describes installation procedure for CentOS. If you use different Linux distribution, select the one you want in the left panel.
Once confirmed that Docker is running on the Linux instance, it can be used straight away for development.
The process is slightly more cumbersome than one would anticipate. In essence, we have to build software artefacts,
required to produce Docker image, on the Windows side of things, then copy them over the Linux instance and run docker
build command again on the Linux instance.
Alternatively, we can push the source code to the Linux instance and build artefacts and Docker image there.
One way or another, once the image is built on the Linux instance it could be used to start a container. Make sure that image provides means to remotely debug your application. The techniques depend upon the programming language that is used to develop application in question, but these days most of the modern languages allow remote debugging.
Again, depending on the language that is used in development process, the build tools might provide means to build images remotely. To use this approach we have to enable remote access to the Docker daemon.
Enable Docker Remote Access
By default, Docker running listening local unix socket only, hence it can only be accessed locally. In order to be able to access Docker remotely it has to be configured to listen to the TCP socket.
However, once TCP socket listener is enabled anyone will be able to access it without restriction, hence anyone will have full control over your Docker instance.
In order to prevent unauthorised access to the Docker instance, we also have to protect Docker daemon socket by enabling TLS verification.
First, follow this guide to enable remote access with systemd unit file or the following guide to enable remote access using daemon.json file.
Next, secure the daemon socket as described in the following article.
One note on configuring remote access: documentation states that dockerd command line options should be as follows:
[Service]
ExecStart=
ExecStart=/usr/bin/dockerd -H fd:// -H tcp://127.0.0.1:2375
However, it looks like the documentation is outdated. The ‘fd://’ option does not work anymore at least on CentOS 7.
With the latest Docker CE you have to use ‘unix://’ socket option instead:
Service]
ExecStart=
ExecStart=/usr/bin/dockerd \
    --tlsverify \
    --tlscacert=/etc/docker/ca.pem \
    --tlscert=/etc/docker/cert.pem \
    --tlskey=/etc/docker/key.pem \
    -H unix:// \
    -H tcp://0.0.0.0:2376
Since Windows instance does not have Docker client installed, you have to validate the Docker daemon setup by running
docker --tlsverify --tlscacert=ca.pem --tlscert=cert.pem --tlskey=key.pem \
  -H=<host>:2376 version
while on the Linux instance. Once confirmed, copy client private key and certificate as well as trusted CA certificate
to the Windows instance and store them securely. Make sure that all three files are stored in the same location
and their names are ca.pem, cert.pem and key.pem.
Using Remote Docker Daemon for development
There are number of ways the remote Docker Daemon could be used in the development process. Usually, we run the applications that we build to test or to debug them. The way you can fit remotely running Docker depends on the language used in your project.
In some cases, there is no way to build and deploy the application to a remote Docker instance other than copy the artefacts to a remote system and invoke docker commands directly in the Linux shell.
However, in some cases there are tools and plugins available that help you.
For example, if you develop with Java or Kotlin there are gradle and maven plugins allowing you to remotely build images.
Let’s take a look how this could be done using gradle. For the purpose of this example we will use the gradle-docker-plugin.
Before modifying your project’s build.gradle file add two variables to the %HOMEPATH%\.gradle\gradle.properties file:
dockerUrl=https://<linux_host_name>:2376dockerKeysDir=<path_to_certs>
In theory, they could be added to the project’s build.gradle or gradle.properties file but this would then couple the
project tightly to the specific environment and hence it won’t be easy to build the code elsewhere without modifying
the source code.
Make sure that <linux_host_name> corresponds the server name, that was used to create server side certificate. If
they don’t match, TLS verification will fail.
The <path_to_certs> should be replaced with the path to a directory where we saved the *.pem files, copied from
the Linux instance.
Now, add the com.bmuschko.docker-remote-api plugin to you build.gradle file. You can find full instructions how to
use the plugin here.
plugins {
  id 'java'
  id 'org.springframework.boot' version '2.1.3.RELEASE'
  id "io.spring.dependency-management" version "1.0.7.RELEASE"
  id 'com.bmuschko.docker-remote-api' version '4.6.2'
}
Next, we have to define a new task that will build a Docker image for us:
task buildImage(type: DockerBuildImage) {
  dependsOn build               // 1
  inputDir = file('.')          // 2
  // dockerFile = file('Dockerfile-dev') // 3
  tags.add(projectName)         // 4
}
This is the minimum required configuration for the task. Here is brief explanation of what each of the calls in the task do:
- Defines a dependency upon the build task, i.e. build task will be invoked prior to buildImage.
- Specifies the docker context, or the root directory for the docker command execution. Since the plugin transfers the content of the directory to the remote host, it makes sense to ensure that
inputDircontains only necessary files that are required to build the image. The path is relative to the project root directory. - By default, plugin will use
Dockerfilefile to build an image. If you have multiple docker files plugin could be instructed to use an alternative one. - Specified the new image tag. In our example, it is set to the project name, but could be anything here as long as it conforms the image tagging rules.
It appears, that when the above task is executed on Windows it fails due to gradle locking one of the files.
As a workaround, we have to copy the Dockerfile to the build directory and use it as docker context root. This requires
an additional task to be created:
task copyDockerFile(type: Copy) {
  dependsOn build
  from 'Dockerfile'
  into buildDir
}

task buildImage(type: DockerBuildImage) {
  dependsOn copyDockerFile
  inputDir = buildDir
  tags.add(projectName)
}
So, we add a task that copies the Dockerfile to the build directory and then use build directory as a root context for the docker build.
Now, run the following command to build the application and create the docker image on the Linux instance:
gradlew clean buildImage

Remote Debugging
Make sure that the Dockerfile is built in the way that it can start application to allow connecting a remote debugger.
The easiest way is to add the remote debugging options to the CMD statement in the Dockerfile:
...

EXPOSE 8080 5009
CMD ["java", "-agentlib:jdwp=transport=dt_socket,server=y,suspend=n,address=*:5009", "-jar", "/app/application.jar"]
Creating a container
Once image is build, we are ready to run the application in the remote container.
The easiest option is to use ssh to get to the Linux instance and run the container there from the command line using docker or docker-compose.
I personally prefer the docker-compose options as it allows easily recreate new version of the container after each build. Install docker-compose to the Linux VM as described in the official documentation.
Create a docker-compose.yaml file on the Linux VM that looks like the following:
version: "3"
services:
  <service_name>:
    container_name: <container_name>
    image: <image_name>
    ports:
      - "8080:8080"
      - "5009:5009"
Replace the values
docker-compose up -d
Now, your application is running and can be accessed at http://<linux_vm_name>:8080. Also, you can access
the IDE’s debugger to the port 5009 on the Linux VM.
Conclusion
Although, it is not always possible to install a Docker instance on your Development machine this should not stop you from using Docker in the software development lifecycle.
You can get the sample project that I originally created for
the Docker and Kubernetes training some time ago, but since then use it for various tests.
It is configured to build development image on the remotely available Docker depending on the content of
the gradle.properties file and has remote debugging enabled.
It requires JDK 11+ though. Make sure that JAVA_HOME variable points to JDK 11+ before building the project.